Author: tarmo120Subject: How to service your Haldex Gen3
Posted: 10 Feb 2014 at 11:38pm
This topic is about Generation 3 Haldex but Generation 4 is mostly the same, just the location of filter and pump is different.
I will show you how to change the oil pump, oil filter and how to change all the oil.
The methods I have used to service my Haldex were probably not what the service would have used, but they worked for me. Also just to be clear, this is only for people who know what they are doing.
I mean if you have never been under a car, I would not recommend you do this by yourself.
Before you start doing anything think about safety. This is something anyone should pay attention to while doing something (in this case) under the car.
I put the car in to neutral, put the handbrake on and brake shoes at the rear axle. Then I put the front of the car on jack stands. So when I turn the driveshaft by hand, the front wheels would turn.
This step is needed to remove the 6 bolts that connect the driveshaft to the driveshaft flange. You can't remove all the bolts when the driveshaft is stationary. There is just no room.
Also before you start removing the bolts on the driveshaft, I recommend you to mark the position of the driveshaft in relation to the flange. See picture.
![]()
Now once you have made a mark or line, you can start removing the 6 bolts. I just used a L-shaped long allen wrench and broke them loose. Since the front wheels are in the air, I jused a quick pull-push method for breaking them loose. Pulled the wrench towards me and while the shaft was spinning I quickly pushed it, causing the bolts to come free. I forgot to pictures of this step.
Now you should have the 6 bolts removed completely and you should have a mark/line on the flange and driveshaft.
This step doesn't neccessarily have to be done, but it felt like it helped.
I removed the 4 bolts that hold the metal plate that holds the driveshaft support. This is about 70cm to the front of the car from the haldex flange. This provided me s bit more room to wiggle the driveshaft.
Anyways next step would be getting the driveshaft out from the tight fit in the flange.
When you look closely the back of the flange, it has 2 holes 180 degrees from one another.
These are 8mm holes. I used on M8x20mm bolt in the hole and just hammered the driveshaft out.
A small distance at a time and you should hammer it equally.
Once the end of the driveshaft is out of the flange, it should drop about 5cm and still be held on by the flange. This is because the end of the driveshaft is not straight but it has a bump at the center.
Now I used my hands and pushed the driveshaft towards toe front of the car and managed to free it from the flange. I also used some zip ties to hold the driveshaft not falling down.
Now hardest part is over. At least for me it was like this. Now you can deal with the Haldex unit.
I completely removed the Haldex from the car to clean it. But this is normally not neccesary.
Next step would be removing the flange from the Haldex.
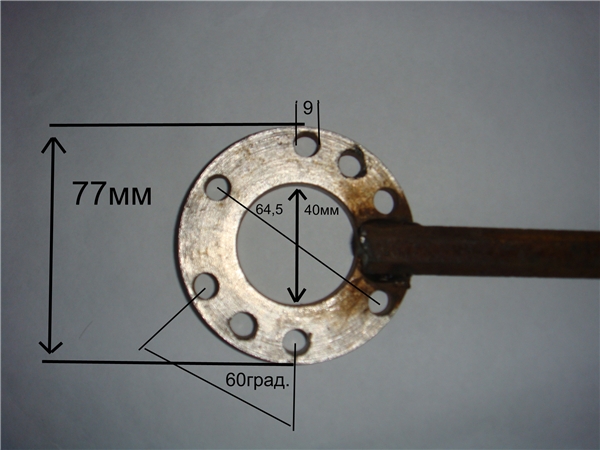
There is actually a tool that makes is easy, but I found that my hands also work.
This tool is to hold the flange from rotating.
![]()
I just used my air impact gun and very carefully removed the nut from the flange. I actually held the flange with my left hand and was very careful not to wrap my gloves to anything.
Once the nut is removed, I took a small hammer and while rotating ang bylling by hand I gave the flange a few gentle hits until it was loose.
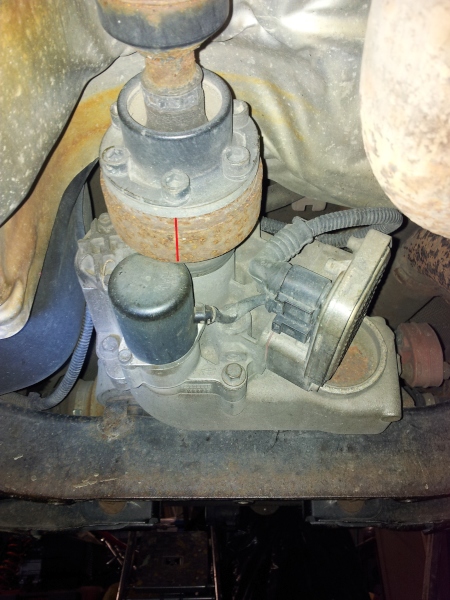
Now you want to change the oil filter and take a look at the oil pump. The location of oil filter is under an aluminium cover that looks like this. These are M4 bolts but I forgot what size allen they use.
![]()
When removing the aluminium cover on the filter you will see a plastic cover blocking you from removing the filter. This cover has a ''nose'' that you can put a screwdrive through it. BUT be VERY careful not to break the ''nose''. Because once you break it, it is very difficult to remove this plastic.
You can put a screw in it or whatever to remove it, because a new one will come with new filter.
Next take the filter out.
Note that everything you remove(aluminium cap, plastic cover, spring, filter and bolts) come new with the filter kit.
![]()
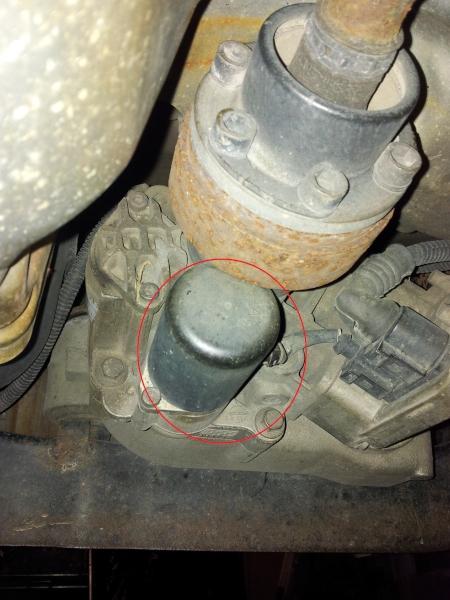
Next you should take out the pump to make sure the pump filter is clean.
The pump is the black thing that has a wire coming out of it. The pump uses same size bolts that are in the filter cap.
![]()
The pump might not want to come out right away. It comes out straight so use your imagination how to remove it. I wiggled it out. Used a 45mm plastid sewage pipe. The clamp is there so the pipe would not stretch so much.
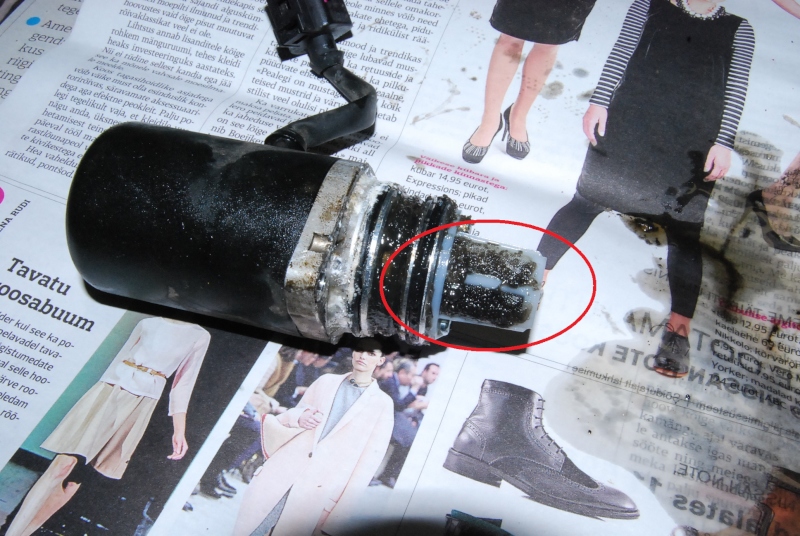
Also note that while the pump comes out straight, you don't want to damage the white filter on the pump. Once that is gone, you have to buy a new pump.
![]()
You want to make sure that this filter is CLEAN. Note that the pump is assembled with TORX bolts. Not allen.
![]()
Now we come to the part where you need to drain all the oil from the Haldex. I didn't see any actual DRAIN plug on the Haldex unit. So I just removed the unit and it drained that way.
There are 4 bolts holding the unit to the rear differential. 3 bolts are easy to get to. But the 4th just above the oil filter is a real pain.
They are 10mm bolts if I remember correctly. I used a combination of short and long sockets and my fingers. Really bad spot to put a bolt to.
Also for this step I would recommend you bolt off the Haldex controller. This is held on by the same allen bolts similar to the filter and oil pump. But these are longer.
And just gently pull it off. There are 2 sensors inside.
![]()
For draining oil just remove the bolts, pull the unit a bit forwars and let it drain a few seconds.
Installation is very similar to removal.
Put the Haldex back, install the bolts, controller, filter and pump and everything else.
Now when installing the flange. I just cleaned everything and added some bearing grease behind the flange as there is visible a bearing. Also I added a bit of red Loctite threadlock to the flange nut. And tightened it using same method I used for removal. Just be careful.
At this point you still have to put the oil in and install the driveshaft.
The oil filler cap is located at the same side of the differential as the Haldex controller. At the side of the differential case there is a cap. Using a pretty big allen wrench I was able to open it up.
There should go about 800ml of oil when you completely drained the Haldex. The fill plug hole is also the control hole. Once it overflows the normal level is met.
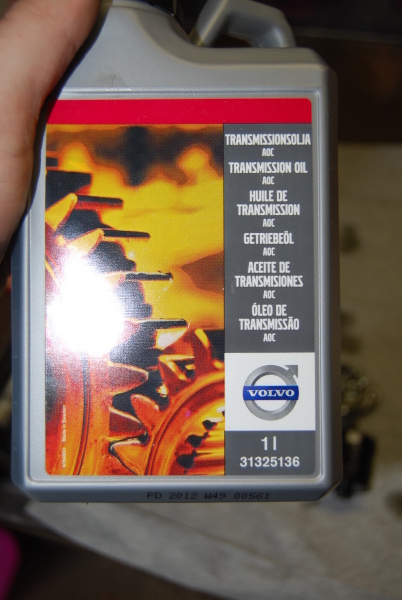
Oh yeah, and this is the oil I got from Volvo.
![]()
Now close the cap hole and install the driveshaft same way you removed it.
Oh man this was a LONG writeup. Sorry for lack of pictures. If anyone has any questions I am happy to help out. I hope I got everything right because it's 2am here.
Edited by tarmo120 - 9 hours 20 minutes ago at 11:40pm
 KING KUGA wrote: